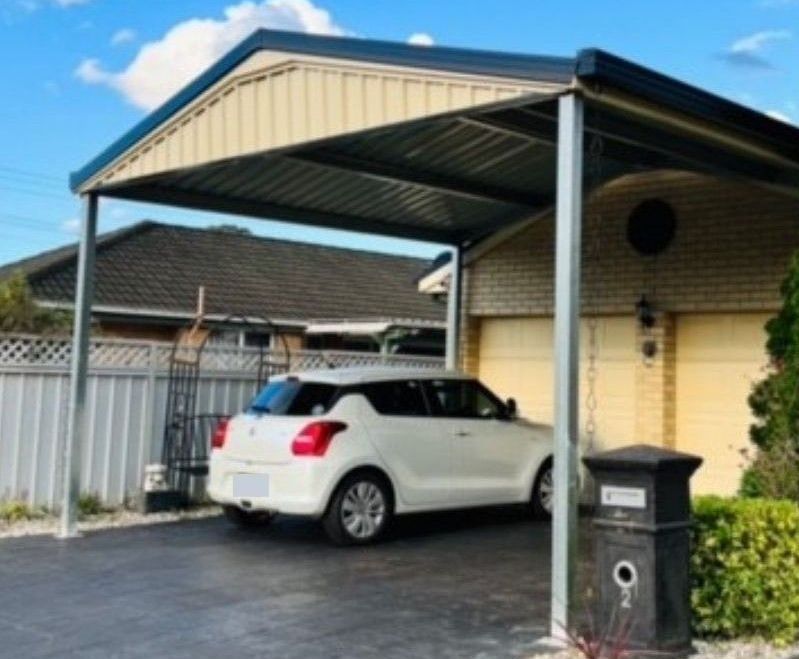
Kitset Carports – Standard Footings
Tips on installing a Kitset Carport
In this article, Kitset Carports – Standard Footings, we will look at some factors affecting carport footing size as well as practical options for your carport footing.
When it comes to carport foundation sizes, people often ask what size footings are needed for secure concrete posts. The answer is that there is no definitive standard as several factors must be considered when determining the size of the footing.
Kitset carports, Carport Footings – Are There Standard Sizes
The size of your carport footing depends on a number of factors. The most key factors are the size of your carport and the wind region you are in. These will determine how big or small you need to make the footings. The next thing to consider is what type of soil you're building on - if it is soft and/or sandy then you'll need larger footings to ensure a firm and sturdy base.
Once you know where you are placing your carport, another factor to consider is whether there are any underground services near where you want place your legs. If there are pipes or cables running underfoot, you may have to consider a different position. This is a reason most councils will demand approval before installing. You will not be permitted to build on top of a main sewer or water pipe.
Factors Affecting Carport Footing Size
There are many factors that affect the size of your carport footing. The most important one is the size of your carport. Any good quote you receive will show exactly how deep the footing need to be for the wind region and site you are intending to erect your carport.
The second factor is where you live and what kind of wind conditions exist in your region. If you live in a cyclonic wind area, for example, then there will be additional regulations regarding the strength and depth requirements for footings. These are determined by Australian Standards and policed council and building inspectors. This can vary depending on where you are. Again, any professional quote will ensure that your carport is designed “site-specific.’ This will allow for all necessary local factors.
Easy Installation of a Kitset Carport
The simplest installation is when you have an existing slab, deep enough and in very good condition where you can use base plates. If you do not have a slab down yet, you can ensure that the concrete is thicker, stronger, and deeper around the area where the posts will sit. Base plates will NOT be approved for most structures in cyclonic areas. Cyclonic carports must be erected with in-ground posts. Some Kitset carports are supplied with base plates and this is the only option for installation. Other Kitset carports may be supplied for in-ground installation only.
Post Size - Kitset Carports – Standard Footings
The size of the posts is determined by the size of your carport. The standard-sized kitset carports require a minimum post size. Many kit carports do not have posts strong enough to match the Australian standards. Professional Choice Carports will have a minimum post size of 100x100 made with the strongest Australian High-tensile steel. A good carport kit will arrive with the necessary ‘extra length’ of posts calculated and cut for your site. Generally, this will be a minimum of 600mm longer than the desired clearance height. This can be much more on a larger carport in a cyclonic area.
Wind Region - Kitset Carports – Standard Footings
If you live in a cyclonic region, it's important that your carport is made for these cyclonic conditions.
In Australia, most areas fall within one of three wind regions. These major wind regions, A, B and C are further divided into sub-regions. The terrain and the shielding factors of the site are also then considered. Again, with a Kitset carport quote, the engineer should have taken all of these factors into account before supplying the quote.
As a general guide, the following are roughly the 3 main wind region areas: -
- Region A - Most of South Australia, Victoria, southern WA and more than half of NSW south of roughly Port Macquarie. Even further north, regional areas more than 60km from the coast are probably Region A.
- Region B - These are higher wind areas mostly north of Port Macquarie in NSW and south of Bundaberg in Qld. In WA north of Green Head. Again, areas further away from the coast are probably Region A.
- Region C – These cyclonic areas are the coastal areas north of Bundaberg in the east and north of Green Head in the WA.
What to Use for your Carport Footing
Concrete is recommended for all footings. Concrete is a mixture of sand and gravel (or other aggregates), water, cement, and sometimes additives like fly ash or slag to give it added strength and durability. When poured into place as a footing, it hardens over time thanks to chemical reactions between its components. It is a much tougher and stronger material than the “Rapid Set” or “Quickset” concrete available at most hardware stores.
Building Kitset Carports
There are basically four steps to installing a carport after the slab is laid if you are laying a slab.
Install the Posts
The first step is to install the posts. Using a spirit level, check that each post is straight and plumb (not leaning). If necessary, adjust the base of each post by digging it out with your spade or shovel until they are at the correct height. Remember, if it is a skillion Kitset, you will have two posts higher than the other two for a ‘high side’ and a ‘low side’ to allow water run-off.
Once you're happy with the position and alignment of all posts of your carport kit, keep them in place by using a frame support to hold them in the exact place and then pour your concrete in the holes. Leave for 24 hours to set before moving on to stage 2.
Bolt the Frame to the Posts
The next step is to bolt the frame to the posts. The bolts should be long enough to go through both parts of the frame and post. This will ensure that they are secure and cannot move around. All fastenings should be supplied with your Kitset so just make sure you are using the correct bolts. All holes in your Kitset should be pre-drilled for you. However, if a new hole is necessary, you can use a hand drill with an appropriately sized bit if you have one available.
Once you've got all main beams bolted, you can bolt on the purlins. Once completed, it's time for final assembly.
Screw the Roof Sheets to the Frame
- Attach the roof sheets to the frame.
- Use screws to secure the sheets to the frame.
- Make sure you don't over-tighten the screws as this may damage the Colorbond sheets.
Fix the Guttering and Flashings
Now you're ready to screw and fix the guttering and flashing to the frame and roof. Remember and allow for a slope on the gutter to allow a run-off to the downpipe. Be careful again, not to over-tighten the screws.
Summary - Kitset Carports – Standard Footings
There is no ‘standard footing’ for a carport installation. Most carports will be installed with the posts cast in the ground around 600mm deep, but others may be supplied with base plates to be anchored on a strong existing concrete slab. The size of the carport, particularly the height, and your wind region will determine the recommended footing set-up for your carport. A good Kitset carport provider will have this all worked out for you in the initial quote.
We hope you have found this article helpful and that it has helped give you some insight into what is involved with installing a carport.